Showing posts with label Kona Cotton. Show all posts

Thursday, April 7, 2016

Some of the other quilts I've finished....

Thanks for all the great suggestions of flower trails (see my post about tulips ).  A Maidenhair Fern asked me about the quilt in the header of my blog.   I thought I'd share some of the quilts I've made over the last couple of years.  (and check out her blog...she has some beautiful quilts and posts).


I made this one back in 2011

This quilt was my entry (and winner!!) to the 2015 Pantone Color of the Year - Marsala 
So many quilts....

This was made for a dear friend who had a crazy accident...but healed up perfectly (it was probably the gift of the quilt that magically healed her...)

And then babies were born...


This was for my niece who loves giraffes - and her gorgeous new daughter.


This was for a friend who is battling a terrible disease...but she's a warrior!

This was my Riley Blake fabric challenge entry in 2015.

But wait ...there were more...


This was for my daughter - I give her a pillow each year.  Can't you just hear the Christmas carols...

And still more............


This was another challenge.  It has writing on the bright green sashing that is a quote from Salvador Dali'.  "Never fear perfection, you'll never reach it."  What it meant to me was don't sweat the small stuff - enjoy the process and you'll get better at it as you practice.  So I quilt a lot....
This is a really snuggly quilt I made on which I finally attempted matchstick quilting.  I love that type of design for quilting - but it takes f o r e v e r to finish...

 
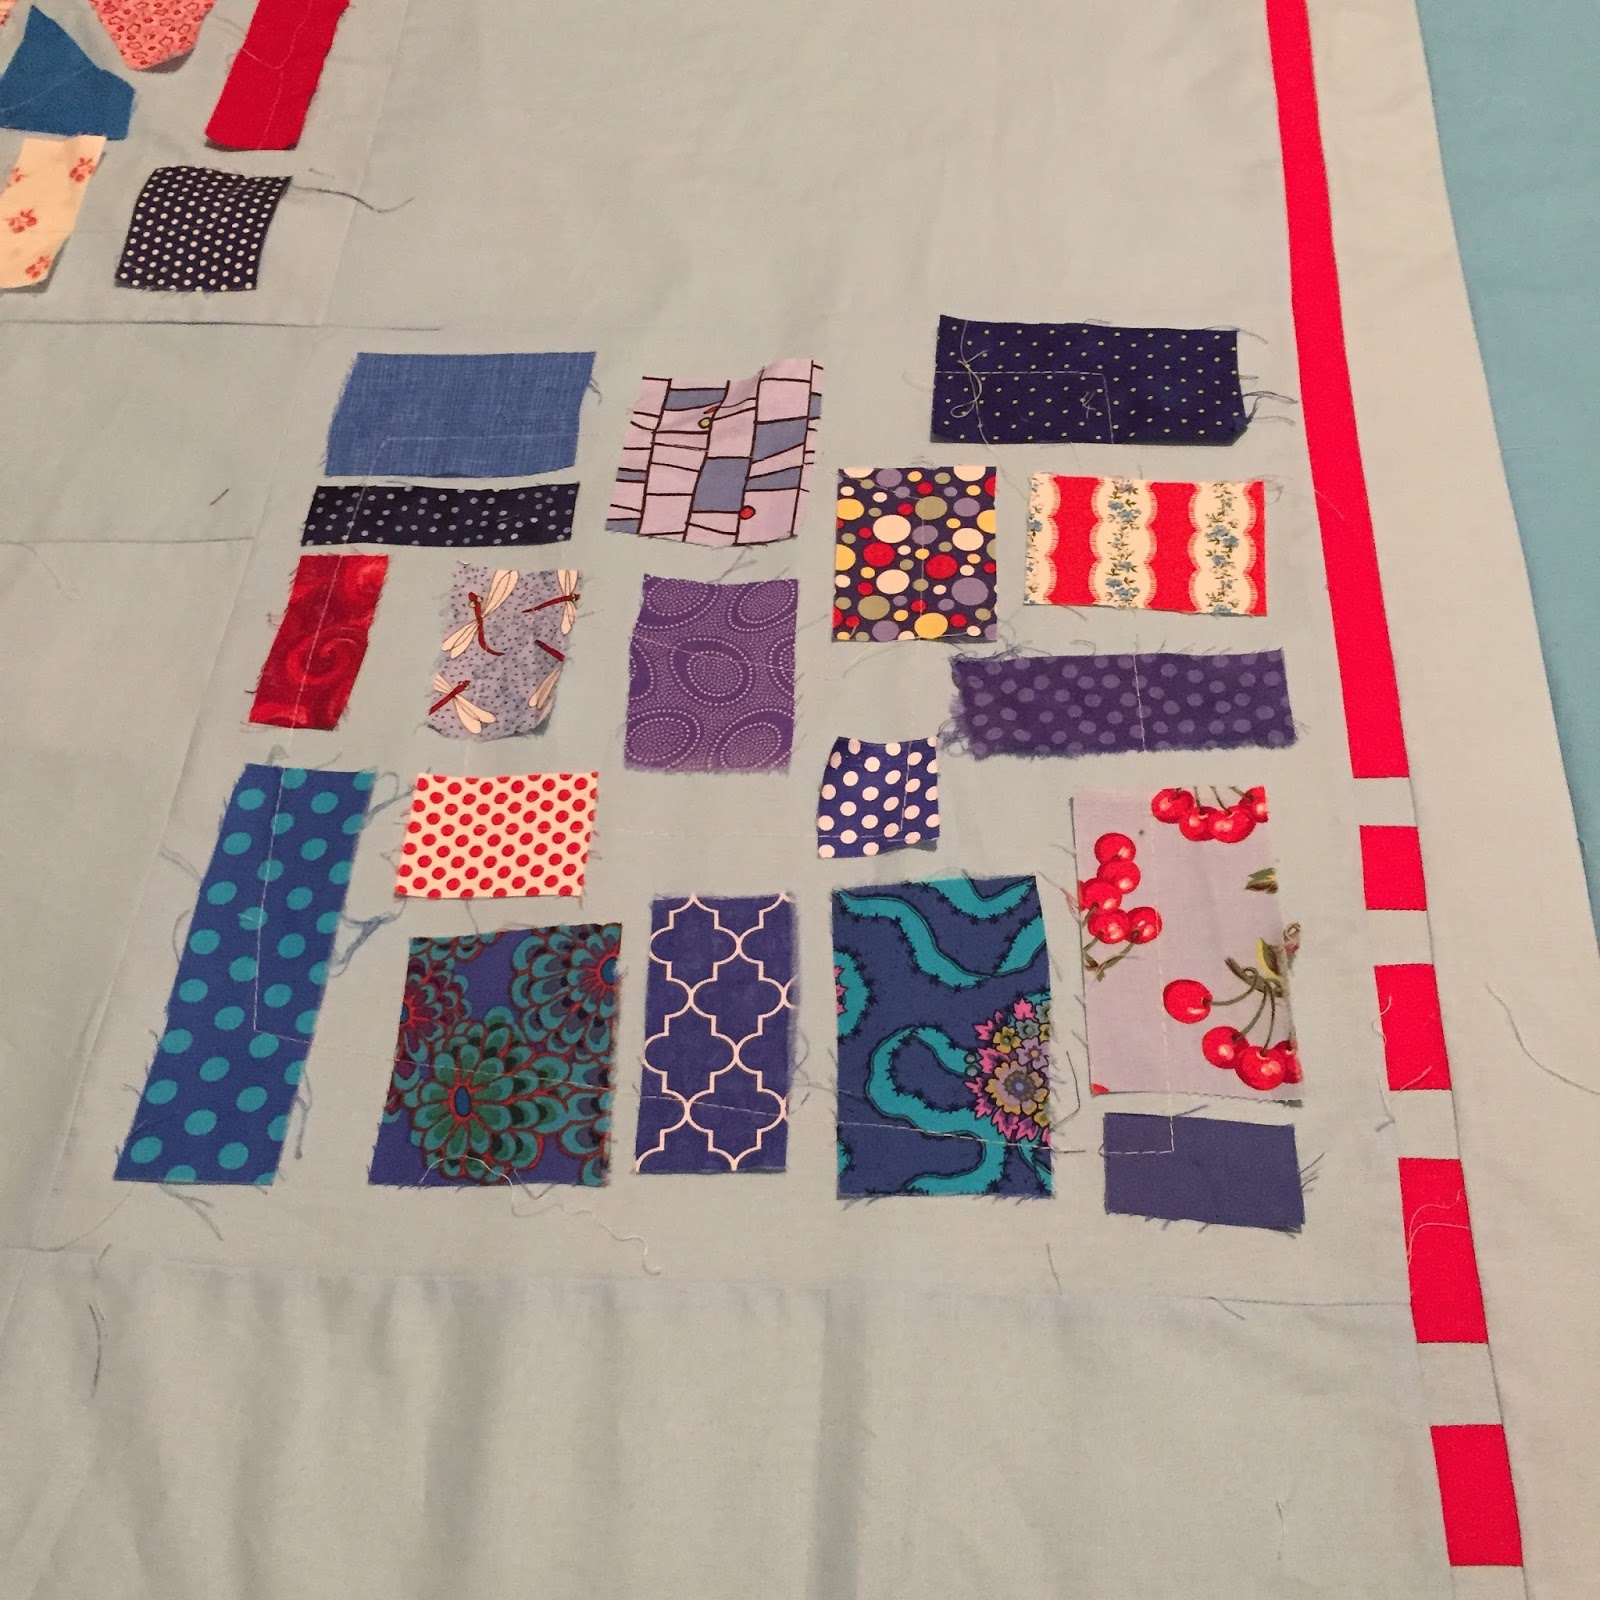
And I liked the style of applying the fabric to the quilt blocks so much - I made another one.

The blocks are made by appliquéing the tiny fabric bits down WHEN YOU QUILT IT!!!   That's like skipping a whole step!!!


I baste (just barely) the tiny pieces on and then while matchstick quilting - they magically get sewn on permanently.  I love the texture of the quilting and the raw edge of the fabric pieces.


What have you worked on that you haven't shown us?


Monday, February 15, 2016

I love LOBSTAH!

So here's my latest project.  I wanted to create something modern looking and using three colors.  I'm in this quilt gang... the Quilt Sluts (southern ladies under tremendous stress) and each year we meet for a week at the ocean.  We have a theme (Mardi Gras this year) and some quilty challenges.  


The Paint Chip Challenge is what I'm focused on right now.  One of us went to the local big box hardware store  and nabbed a boat load of paint chip samples. At our monthly soiree, a ceremonial paper bag was passed around and each person pulled 3 chips out.  You could toss one chip and reselect - but then you had to live with that choice.  I was INCREDIBLY lucky...I got turquoise, aqua, and orange.  They have no idea the creature of creativity they unleashed....
This is the back side of the lobster - he still has the fusible web silicone sheet attached.

I had to let the ideas and colors simmer for a couple of months and just as I suspected.... the inspiration was found!  Some random thing I saw made me think - Orange +Lobster.  And then of course, the blues took care of water.  

I drew out the lobster on paper (many, many times) and then transferred that onto clear plastic.  I picked up an old school projector many years ago (quilting tools come from many sources) so then I projected that onto my wall.  I was able to enlarge it to a size I thought I'd like (he's about 36 inches tall).  

From there I sewed 1.5 inch strips of orange fabric and recut and resewed.  I wound up with gorgeous tiny little squares of scrappy orange fabric to use for my lobster.

After that...I struggled with how to create a background that wouldn't be terribly distracting.  Even though I wound up making 4.5 inch HST's, I think it doesn't read too busy.  I added the strips of solid to the side and bottom to create a more modern look.


I've only got him pinned on right now but I've got fusible web on the orange so I"ll fuse all of that down next.  I think I have my quilting design in my head...but I am a pretty organic quilter so that may all change by the time the needle hits the fabric.  Hoping to start quilting in a day or two...  

And for the record, how do you pronounce lobster?  I'm from the south - so "lob - stir" is how I say it.

Linking up with several fabulous Linky parties  - check them all out!  Here are some of the quilts in progress I loved this week:

Valentine quilt with no name

Gooseberry Secret Garden

Rowing along

No more bunny ears

Maryse Makes Things

Quilty Habit


Friday, December 4, 2015

Emergency quilt - please excuse the poor photography...

 Thanking you in advance for your understanding...  Some dear friends of ours were celebrating their 40th wedding anniversary and my DH asked me if I wanted to make them a quilt.  I was thrilled to do that for them.  I didn't realize it had to be done in 2 days.


That's supposed to look like a ruby...

So off to the sweat shop I went and cranked this one out.  I was proud of the end result and was able to put some really nice free motion quilting in the negative spaces.

I've said before...I do well under pressure.


The Mrs. loves a fall color palette so I chose that center block as my inspiration for the design.


Of course, we were not without some controversy...


But I persevered and it came out lovely.


Have faith in yourselves....you'd be amazed what you can do when you absolutely - guaranteed - have to make a deadline..

It was approximately 65 x 75 inches.  Chocolate brown solid was a Kona (can't remember which color).

What was your last "had to make it crazy ASAP" quilt?

Linking up with Crazy Mom Quilts  and Can I get a Whoop Whoop today!


Monday, November 30, 2015

My family needs better upper body strength

Ping says this one is her favorite so far.

The whining I've endured while photographing my quilts is hilarious.  If I'm helping a friend photograph a quilt, I suffer in silence.  Yes, my arms are like limp noodles when I'm done but I dutifully stand there in pain until it's done.  Buck up family....I'm not stopping the entering of contests because you can't hang....    I can see now...I'm going to have to put my family on an upper body exercise program.

But...on a more important note... I FINISHED MY LAST DEADLINE!  Death Star is officially done! Prepare yourself to be inundated with gratuitous quilt photos...  Get your popcorn and beverage, the show starts now...


I've used quite of few of these during the quilting of this quilt...

I love quilting on my Handi Quilter Sweet Sixteen Sit down model.


I wound up quilting the circles on my Bernina 440.  Don't get me wrong...I've said you  won't be able to pry my Bernina from my cold dead kung fu grip (unless you're making me quilt on it...).  Once I got the Sweet 16, I created the perfect set up for quilting.

And then there was the squaring up...  This is one of those parts I dislike.... it's hard to ensure you're getting it really square.  This part becomes really tedious...


But it gets done and then it's on to the binding.  I love the binding.  It was the only thing I liked to do by hand but now a days I machine it on.  I like the look just as much.


I put a LOT of quilting on this one.


I enjoy the design decisions you have to make.  It can be a little daunting...you want it to make sense where it's placed on the quilt.  I thought about this part almost as much as the overall design.


And finally....it's done.  This is the Death Star bc.  BC is before crinkle.  I'm always a little apprehensive that something will go terribly wrong in the washing machine...


It washed up beautifully and then...it's Death Star ac.  After crinkle.


Here's the sassy back of the quilt:


I added a little flair to the binding in two spots:


So that's my story today.  Finished a quilt.  It was a great day.  It's submitted to QuiltCon 2016 for the contest....fingers crossed it's selected!!

I'm linking up with Judy today at Patchwork Times - check it out!  On Tuesday I'm linking up with Alyce at Blossom Heart Quilts.

And on Wednesday I linked up with Let's Bee Social

Check these blogs out...


Saturday, November 28, 2015

A.L.M.O.S.T. done.....

So I finished this one:
Opposites Attract - 31 inches square

It's my entry to QuiltCon 2016 for the Michael Miller Glitz Fabric Challenge.  I called it "Opposites Attract".  The Glitz fabric seemed formal and opulent so I countered it with saturated color and whimsy.  Even the back carried the opposites theme with the two kinds of fabric and a circular label.


My other entry to QuiltCon 2016 was "Have No Fear".  I originally made this piece for another contest...but I'd missed the deadline (very much out of character for me...).  I really loved the end result so I felt good about having another chance to enter it.  The premise for this one was ...have no fear.  Don't be afraid to make a mistake.  You'll learn so much more by doing and trying than you would laboring over strict perfection.  

When I first started quilting- I was only making intricate 12.5 inch blocks.   I was caught up over making sure every point matched and every quarter inch sew line was accurate.  A wise teacher, Charlotte Angotti, said to me once, "do you want to make one quilt a year....or 12 quilts a year?"  That was the light bulb moment for me.  I wanted to make as many as I could but at the rate I was going.... I'd be lucky to make one quilt a year.  Boom.  Off to the races I went and I've never regretted it.  So what if all my points don't match perfectly EVERY time.  I found the more I made - the better I got.  So when I designed this quilt, I found the quote by Salvador Dali.... "Have no fear of perfection, you'll never reach it"  was the perfect sentiment (and as a stater of the obvious....I made one of the blocks wrong on purpose).

Have No Fear - 57 inches square


I printed the quote out (from Word) on paper and used a light box to trace the letters on the fabric.  Then I free motion machined over the tracing to make the lettering on the quilt.  It was a good way to get accurate lettering.  I'll definitely use this technique again.

Down to my last quilt deadline for the year...  The Death Star is under the needle right now.  I took a break to relax my neck a bit.  I don't usually get tense while quilting but it's been a busy week with Thanksgiving, putting up Christmas decor, and having the family around.  Good hectic - but I'm a little tired.  So this quick break was good for my creativity.  I've got a LOT of quilting to go...

Have you tried any new quilting techniques lately?

I'm Linking up with CrazyMom Quilts  (oops - missed it this week) , Confessions of a Fabric Addict   , Creative Goodness Linkup, and A Quilted Passion Check out their great blogs - LOTS of great quilty things to look at....


Thursday, November 12, 2015

Torture circle heaven, chopsticks, and a speed demon: a tutorial

If that title doesn't draw you in, you're living a really exciting life or you have no curiosity.

Ping is basking in the glory of my circle making...
I've had many requests about how I made my circles.  For many years, the dreaded torture circle was low on my list for putting on a quilt.  While I love the shape, making it round and look good is another story.  I own many templates (on a side note - my GOSH----why haven't I bought stock in Lucite or Acrylic plants?  Because my inventory of rulers alone has made some crusty old guy with no idea or love for quilting... a fortune) and tools to make circles....but they never seemed to work that well.

Finally...I saw the light.  Somewhere (and I'm very sorry I'm not able to remember who or where so I can credit them) I saw someone make a circle this way.  For me - it was the light bulb moment.  If you've seen this before - then congratulations - you've probably been in some kind of circle heaven of which I've only recently been  accepted.  But if you haven't...and you suffered in torture circle purgatory like me...then here's your ticket out.

Circle tutorial:

Materials:

  • the swatch of fabric you wanted to make a circle
  • Pellon SF 101 
  • something to create a circle with - template, bowl, your neighbor's kid's ear guage plug
  •  something to mark the fabric
  • scissors
  • walking foot on your sewing machine
  • chopstick
  1. Process:
  2. Pellon SF101 is a fusible interfacing.  Fairly Merry ((famous quilter and close personal friend in fabric) find her at @FairlyMerry on IG) turned me on to this stuff about a year or so ago.  It's fantastic for lining bags, as well as the bomb for circle making.  I got mine at JoAnns.
    1. There are two sides to SF101 - a rough side and the smooth side
    2. The rough side is the glue /fusible side - the smooth side is the "right" side of the fabric
  3. Take your piece of fabric and mark a circle on it.  Be accurate in your marking as you will be cutting on this line.  You will be sewing a quarter inch around the circle - so keep that in mind if you are trying to make a specific size of circle - factor the quarter inch.
  4. Cut the circle out.  Be accurate here - it will be important as this is the guide for your sewing.  I'm an improv kind of gal and LOVE to fudge things or sew loosely.... but this is where tedious accuracy pays off.
  5. Lay the right side of your circle on the smooth side (also the right side) of the SF101.
  6. Install your walking foot.  I'm telling you - another point not to ignore or skip.  It will make a huge difference in result (positive) if you use your walking foot.  You will be sewing a quarter of an inch - but you could sew wider if you wanted. I line the edge of my fabric with the edge of the inside of the foot.  It's easy for my eye to follow it.
  7. I like the needle down position - you want something holding it in place when you stop to adjust the fabric.  Also, (this is the much anticipated speed demon reference....) slow your roll.  I push my speed down for this sewing and go slow.  You must understand... for my entire quilting existence (right at 20 years), I've had to sew in between everything else in my life.  Mom duties,  wife duties, work, work, work, etc.  So I have always had to make the most of my sewing time and have fallen into the habit of sewing like a speed demon.  Circles require a zen like presence.  Be one with your machine ... slow down.
  8. I sew slowly and adjust frequently.  I keep my foot right on the edge of the fabric and take my time.  I meet at the end and sew a few stitches over the start of the circle.

  1. Sorry - this was supposed to be a video.  You'll just have to be patient with my technical skills...
  1. I use pinking shears to cut the circle out.  Be careful - you don't have a lot of room for error here.
  2. I pull the SF101 off the circle and take a little snip with my pinking sheers - probably a 3 inch cut.  This is so I can turn it inside out.
  3. I make my husband take me out for hibachi and grab an extra set of quilting tools while I'm there.  Seriously - chop sticks are fantastic tools!  I use the end of the chop stick to slowly push out and almost crease the fabric.  If you find you have a flat spot on an edge - you can take a needle and kind of pull out the fabric a bit.   Or chop stick it, again.
  1. Dang it....another riveting video I couldn't get uploaded....
  1. I look at all my edges before....steaming the snot out of the circle.  For those of you who are faint of heart when hearing about using steam - I say - be gutsy.  I steam everything.  I live on the edge all the time and in all my years have never had a quilting incident (shrinkage or bleeding, etc).  You don't have to use steam (in fact - I'm not positive about the actual instructions for use of the SF 101 - but I've been steaming since I started using it and no problems to report).  The mere act of ironing it will activate the fusing on the SF 101 and it will create a lovely little bond to your circle.

  1. Look at how lovely it is.  Now why would I have ever doubted my ability to create circles!
  2. Attach the circle in the method you prefer.  I machined mine on to my quilt using a button hole stitch on my machine.  I match the thread to the circle as the majority of the thread lands on the circle vs. the background.  I included the close up of the appliquéd circle so you could see how the thread disappears.
I use the single thread button hole stitch

This is the back of my quilt

Button hole stitch

Button hole stitch detail shot

Now . go forth - create circles and have no fear!

And here is one more teaser...I'm working on quilting this one and then I'll show it when it's done.


I'm linking up with Amanda Jean of CrazyMomQuilts today - check out all the great stories here: Crazy Mom Quilts

And Sarah of Confessions of a Fabric Addict here:  Can I get a Whoop Whoop!!